
Gmail Bulk Sending Template | Easily Send to Multiple Recipients via Google Sheets

The template introduced in this article is a paid product.
Have you ever wanted to send bulk emails with Gmail more easily?
In a previous article ▶︎ Boost Productivity: Automate Gmail to Multiple Recipients with Google Sheets and Apps Script, I introduced a sample Google Apps Script (GAS) that lets you send emails in bulk directly from a Google Sheet.
However, the previous method required some extra steps:
- Copying and pasting the script, then setting it up
- Writing the email subject directly in the script
- Configuring the spreadsheet layout
These steps could be a bit of a hassle for some users.
That’s why I’ve now created a more practical and easy-to-use “Gmail Bulk Sending Template.”
With this template, you can:
- Set email subjects directly from the sheet
- Easily select recipients using checkboxes
- Support HTML emails and drafts with attachments
- Send emails with a single click, with features to prevent duplicate sends
This makes managing bulk emails even more intuitive.
If you’re looking to streamline your email workflow, give this template a try!
If you want to jump straight to the template download, you can skip ahead here.
Template Features
- Send Gmail messages in bulk to multiple recipients directly from your Google Sheet
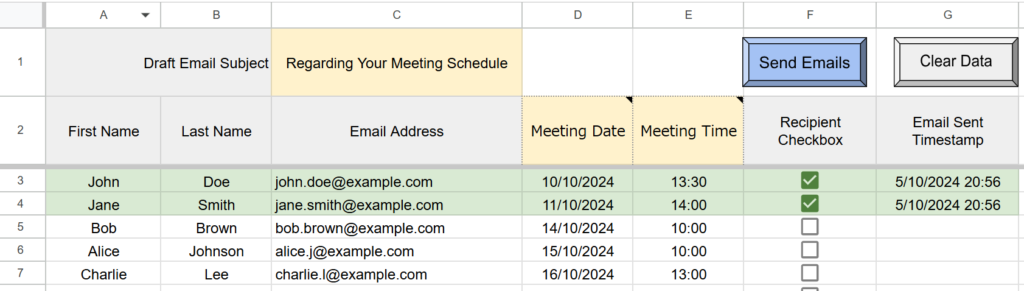
- Set the draft email subject using cell C1
- Freely configure merge fields for Gmail (such as meeting date, meeting time, etc.)
- Manage recipients with checkboxes
- Record the email sent date and time in column G to prevent duplicate sending
- Includes data clear functions (reset only checkboxes or reset all data)
- Can be easily duplicated for different projects and reused
Differences from the Free Script
| Item | Free Script Version | Paid Template Version |
|---|---|---|
| Email Subject Setting | (Set directly in script) | ✅ (Easily set via cell C1) |
| Placeholder (Body Merge Fields) | ✅ | ✅ |
| Data Clear Function | ❌ | ✅ |
| Sheet Reuse (Sheet Copy) | (Script modification required) | ✅ (Can be reused by copying the sheet) |
| Execute with Button | (Need to create your own) | ✅ (Button pre-installed in template) |
In the previous article, the free script required you to directly edit the script to set the email subject and sheet name.
With this new template version, you can change settings simply by entering them into cells—no need to modify the script itself.
This makes it much easier and more flexible to use.
How to Use the Template
Before using the template, prepare a draft email in your Gmail account.
In the draft, set up any information you plan to insert from the spreadsheet.
In the email body, include placeholders (keywords enclosed in curly braces, like {}) as shown below.
Subject: Regarding Your Meeting Schedule
Body:
Dear {Last Name},

We are planning a meeting as follows:

Date: {Meeting Date} *(You can change the placeholders to match your own email content)
Time: {Meeting Time} *(Same as above)
The content from the corresponding columns in the spreadsheet will be automatically inserted into these placeholders (keywords enclosed in curly braces).
| Placeholder | Spreadsheet Column | Example Content |
|---|---|---|
{Last Name} | Column A | Smith |
{Meeting Date} | Column D | October 10 (Thu) |
{Meeting Time} | Column E | 13:30 |
Please feel free to modify the placeholders as needed to match the content of your own email.
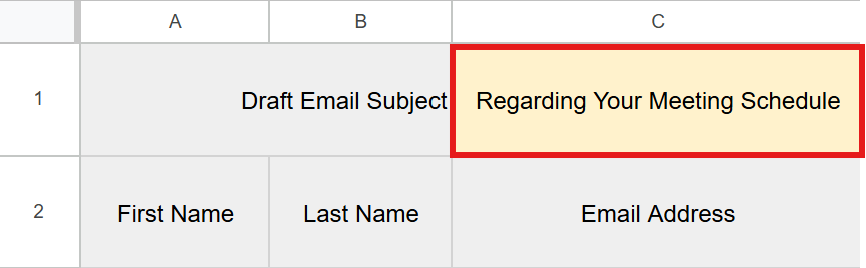
Enter the subject of the draft email you created in Gmail into cell C1.
When sending emails, the draft with the matching subject will be used.
(The original draft will remain, as the email is sent by duplicating the draft.)
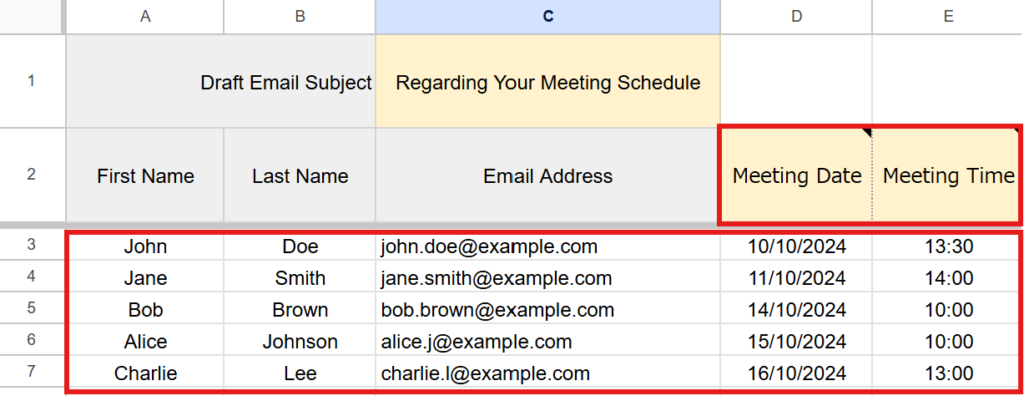
Enter the name, email address, and merge fields (such as meeting date).
You can freely change the field names in cells D2 and E2 (yellow cells) to suit your needs,
but make sure that the field names match the placeholder names used in your Gmail draft.
For example:
- If you enter “Meeting Date” in cell D2 → Use {Meeting Date} as the placeholder in the draft email body
- If you enter “Meeting Time” in cell E2 → Use {Meeting Time} as the placeholder in the draft email body
By managing the field names in the spreadsheet and the placeholders as a set in this way, the information will be inserted correctly.
When you change the placeholders, don’t forget to also update the corresponding column names in the spreadsheet.
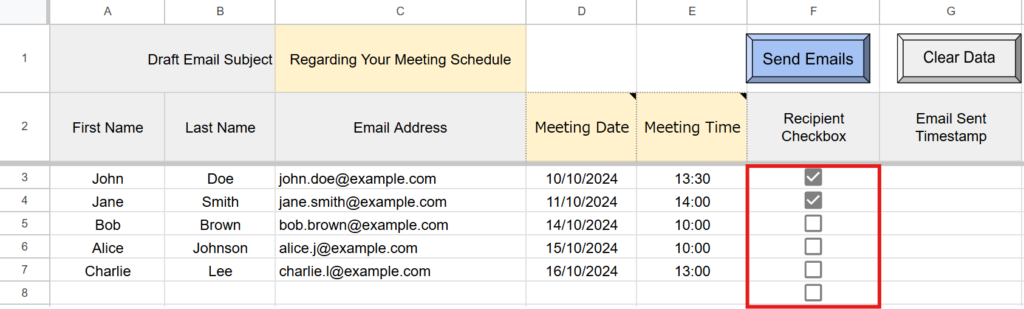
Check (✔) the recipients you want to send emails to.
Emails will only be sent to rows where column G (email sent timestamp) is empty.
(This helps prevent duplicate sending to the same recipients.)
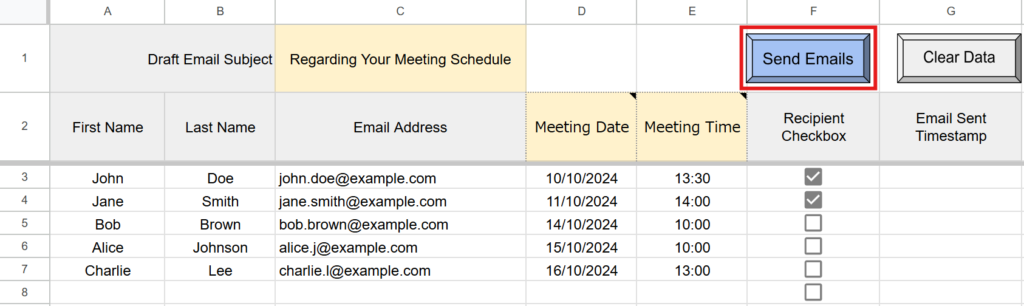
Emails will be sent in bulk to all checked recipients (each email is sent individually).
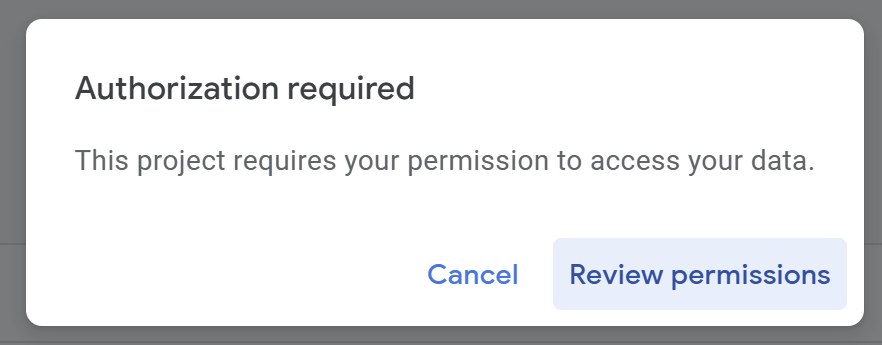
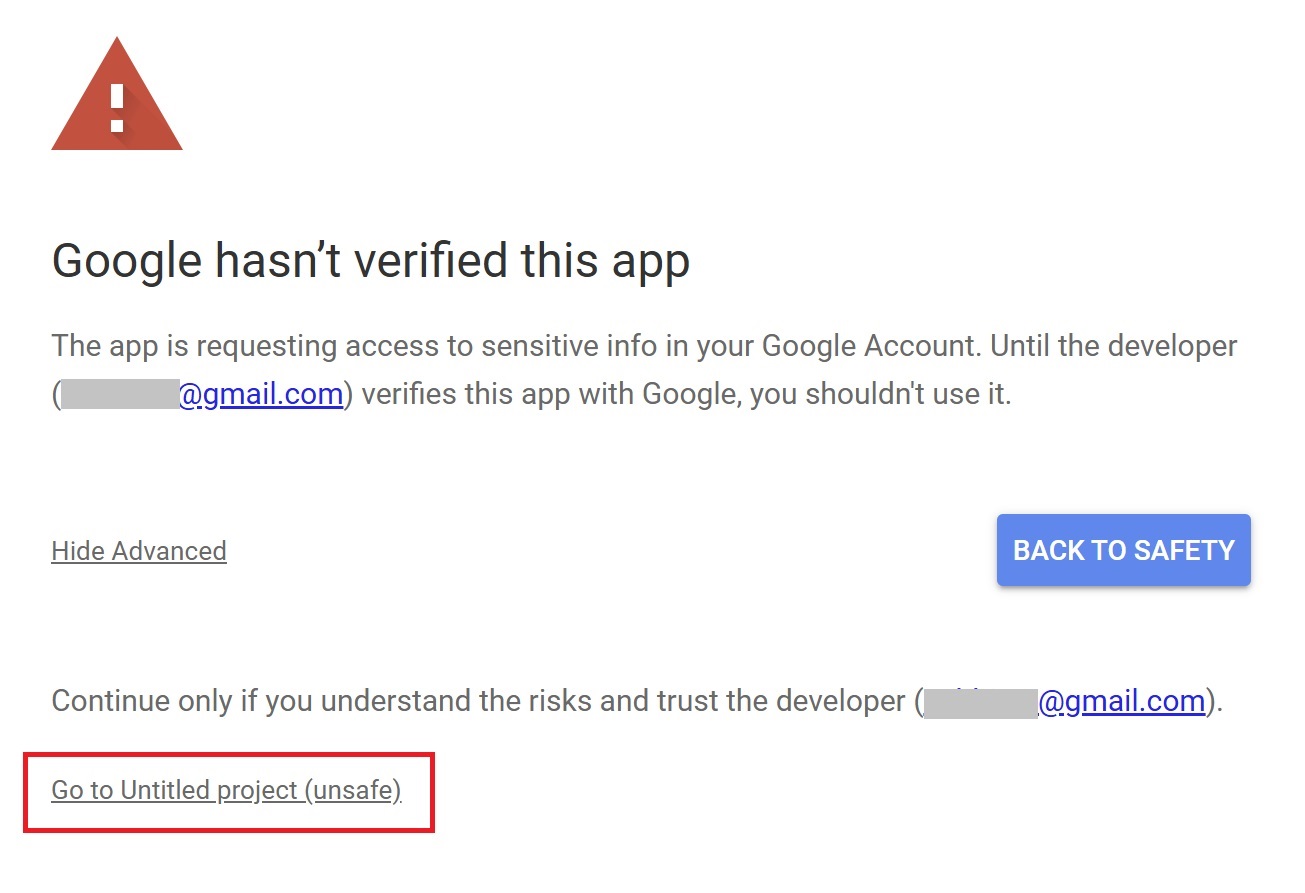
If you’re running the script for the first time, you need to authorize it.
Therefore, press “Review Permissions.“
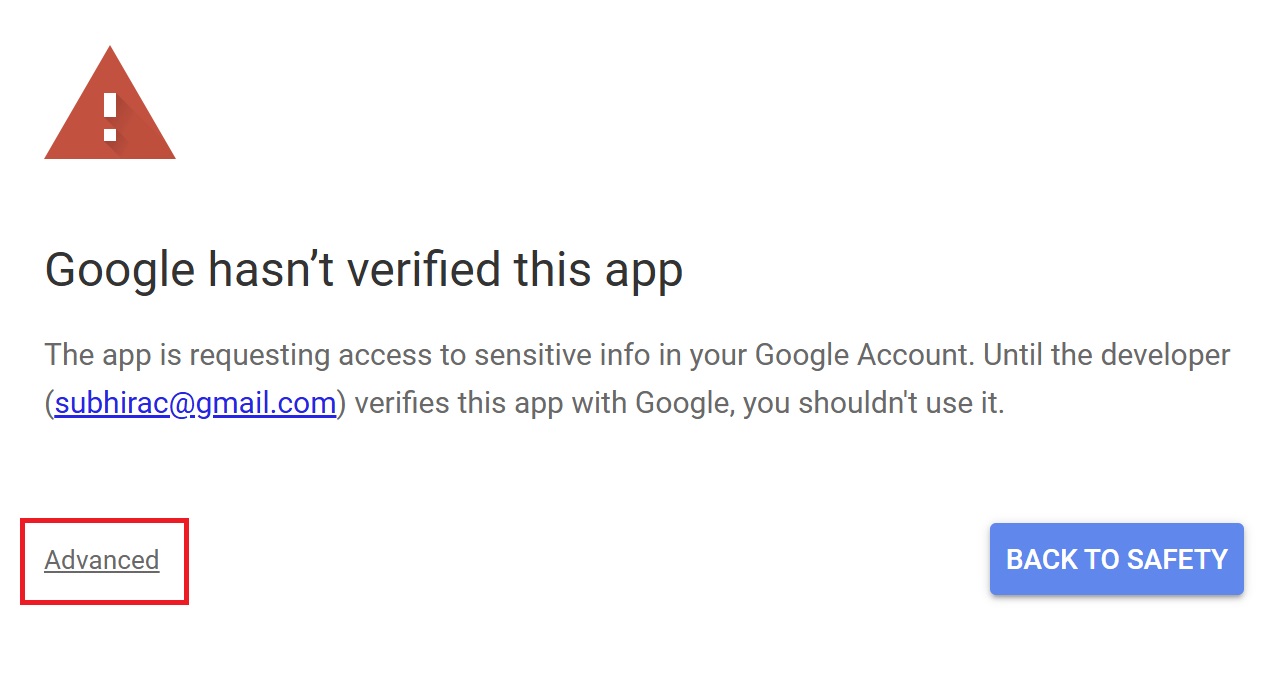
Detailed Authorization Steps
Press “Advanced.”
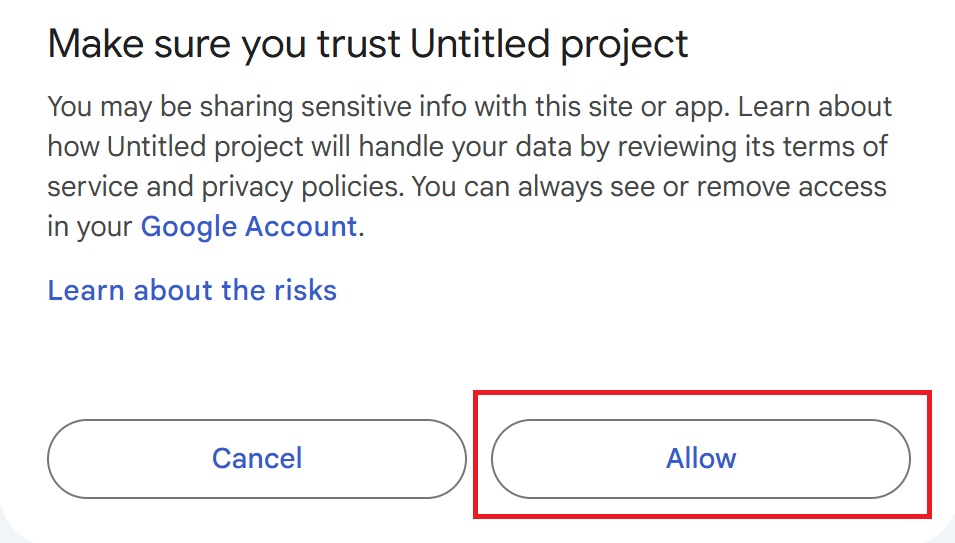
Press “Go to Untitled project (Unsafe).”
After that, press “Allow.”
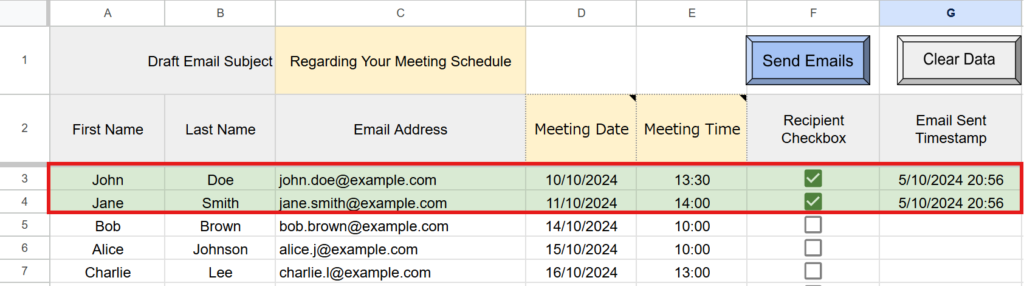
After sending, the date and time of sending will be automatically recorded in column G.
Additionally, the background color will change to green to indicate that the email has been sent.
When you open Gmail, you will see the sent emails in the “Sent” folder as a record.
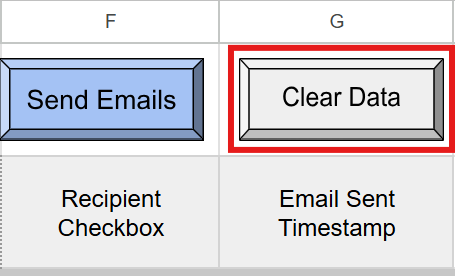
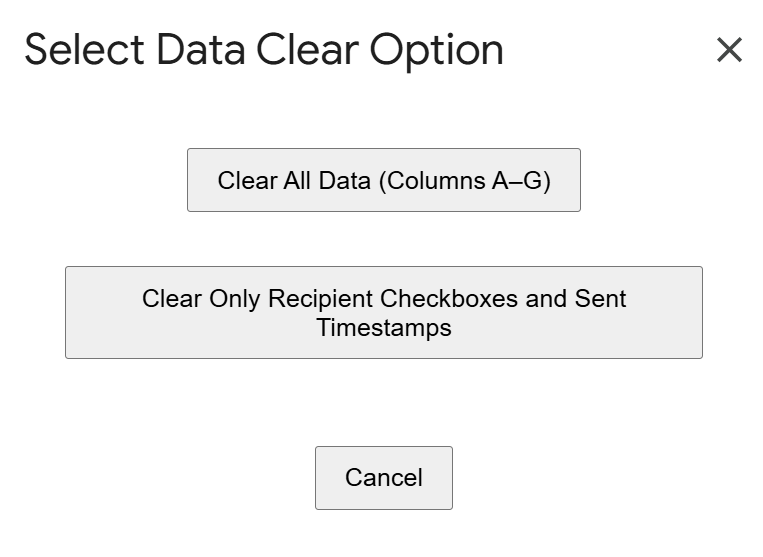
Click the “Clear Data” button to display clear options.
You can choose to clear all data, or only clear the recipient checkboxes and sent timestamps.
This is useful when reusing the template.
Notes
- Set Placeholders in Your Draft Email
Insert placeholders in the email body that correspond to the columns in your spreadsheet.
If you don’t need to use placeholders, you can use the template without them.
(Example:{Meeting Date}→ The content of the “Meeting Date” cell in column D will be inserted.) - Placeholders must exactly match the field names in your spreadsheet
For example, cells D2, E2, etc. If there is any mismatch, the data will not be inserted correctly. - The draft subject in Gmail must exactly match
The subject you enter in the spreadsheet must match the subject of the draft in Gmail. - Emails will not be sent to rows with a timestamp in column G, even if the recipient is checked
This setting helps prevent accidental resending to recipients who have already received the email. - Be aware of Gmail’s daily sending limit
(About 500 emails per day for free accounts.) - Check your email with a test send
Before actual use, please send a test email to your own test address to confirm that the email body and merge fields are working as intended.
Download the Template Here
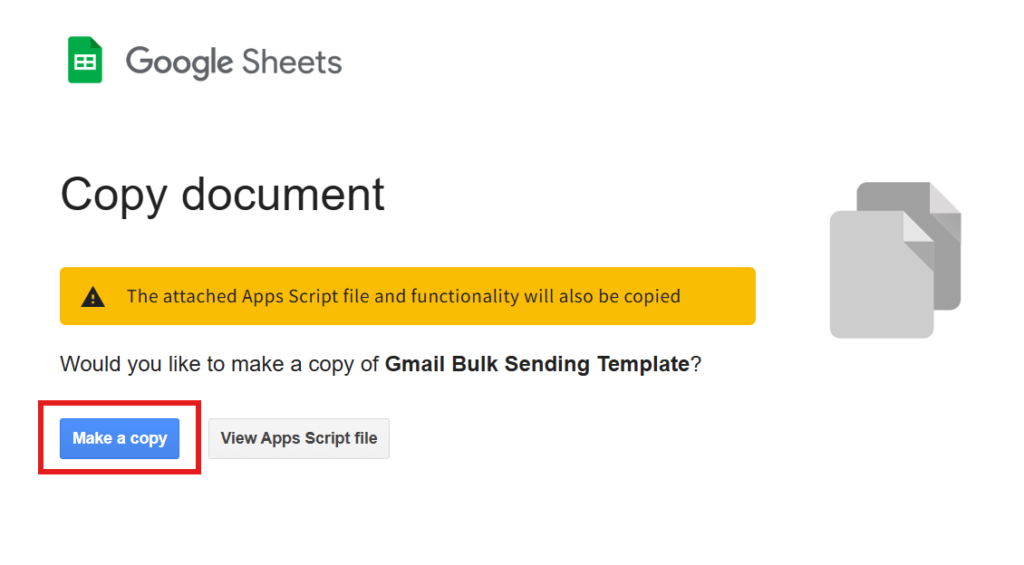
You can copy the completed template from the link below (Google Sheets).
By using this template, you can skip the setup process and start sending emails right away.
- Google News Fetch Template: Streamline Information Gathering with Google Apps Script and Google Sheets
- Gmail Draft Duplication Template | Attachments Supported! Automate with Google Sheets × Apps Script
関連記事
-
 Google Calendar Free Time Finder Template|Google Sheets × Apps Script
 -
How to Find Common Free Time in Google Calendar: Manage Shared Schedules with Google Apps Script
-
Ready-to-Use Google Calendar to Sheets Export Template| Google Sheets & Apps Script
-
Export Google Calendar Events to a Spreadsheet|Easily Get Schedules for Multiple Users with Google Apps Script
-
Gmail Draft Duplication Template | Attachments Supported! Automate with Google Sheets × Apps Script
-
Google News Fetch Template: Streamline Information Gathering with Google Apps Script and Google Sheets
-
Google Sheets YouTube API: Retrieve and List 500+ Videos with Apps Script
-
Create Gantt Charts in Google Sheets: Auto-Update with Start and End Dates