Enhance User Interaction with Google Apps Script: How to Add Confirmation Pop-Ups to Prevent Mistakes

When you add a script execution button to a Google Spreadsheet, it’s convenient to run the script with just one click. However, have you ever felt worried about accidentally clicking it?
This concern is especially significant for scripts involving actions like sending emails or deleting data, as executing such processes without confirmation could lead to major mistakes.
In this article, we’ll introduce a method to display an “OK” or “Cancel” confirmation pop-up when using Google Apps Script.
By implementing this feature, you can effectively utilize scripts while preventing operational errors.

Example Output

- A pop-up is displayed with a confirmation message: “Do you want to send the email?”, and two buttons, “OK” and “Cancel”, are presented.
- If “OK” is clicked, the email sending process is executed, and the result is displayed in another pop-up.
- If “Cancel” is clicked, the email is not sent, and a pop-up appears stating that the process was canceled.
When the script is executed via a trigger, the pop-up is ignored, and the script continues without waiting for user interaction.
How to Create a Pop-Up
Sample Script Example
function sendEmailWithConfirmation() {
    // Get the UI for the Spreadsheet
    var ui = SpreadsheetApp.getUi();

    // Display a confirmation pop-up
    var response = ui.alert("Confirmation", "Do you want to send the email?", ui.ButtonSet.OK_CANCEL);

    if (response == ui.Button.OK) {
        // Email sending process
        try {
            // Write specific email sending code here
            // Example: GmailApp.sendEmail(email, subject, body);
            Logger.log("The email has been sent!");

            // Show a success message in a pop-up
            ui.alert("Success", "The email has been sent!", ui.ButtonSet.OK);
        } catch (e) {
            // Handle errors
            Logger.log("Failed to send the email: " + e.message);

            // Show an error message in a pop-up
            ui.alert("Error", "Failed to send the email. Details: " + e.message, ui.ButtonSet.OK);
        }
    } else if (response == ui.Button.CANCEL) {
        Logger.log("The email sending was canceled.");

        // Show a cancel message in a pop-up
        ui.alert("Canceled", "The email sending has been canceled.", ui.ButtonSet.OK);
    }
}
Script Explanation
- Creating a Pop-Up
-
- Use
SpreadsheetApp.getUi()to access the Spreadsheet’s UI andui.alertto display a pop-up. - Specify
ui.ButtonSet.OK_CANCELto display two buttons: “OK” and “Cancel.”
- Use
- Behavior of “OK” and “Cancel”
-
- If “OK” is selected, the email sending process is executed, and the result is displayed in another pop-up.
- If “Cancel” is selected, the process is aborted, and a message indicating the cancellation is displayed.
- Error Handling
-
Use a
try-catchblock to handle errors appropriately if an issue occurs during the email sending process.
Write the specific code you want to execute in the following section of the script.
// Write specific email sending code here
// Example: GmailApp.sendEmail(email, subject, body);
Example: Sending an Email with a Fixed Recipient and Content
If the recipient, subject, and body are fixed, you can write the following:
GmailApp.sendEmail("example@example.com", "Test Email", "This email was sent via a script.");
- example@example.com: The recipient’s email address.
- “Test Email”: The subject of the email.
- “This email was sent via a script.”: The body of the email.
How to Customize the Messages
The messages displayed in this script can be customized by modifying the following four sections:
- Confirmation Message Title and Body
-
The confirmation message in the pop-up is set using the first and second arguments of the
ui.alertfunction.ui.alert("Confirmation", "Do you want to send the email?", ui.ButtonSet.OK_CANCEL);First Argument (“Confirmation”)
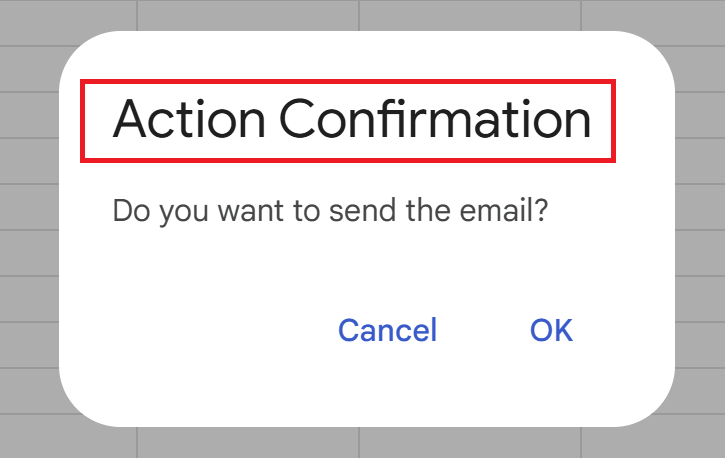
Sets the title of the pop-up.
Example: Change it to
"Action Confirmation".ui.alert("Action Confirmation", "Do you want to send the email?", ui.ButtonSet.OK_CANCEL);When the script is executed, it will change as follows:

Second Argument (“Do you want to send the email?”)
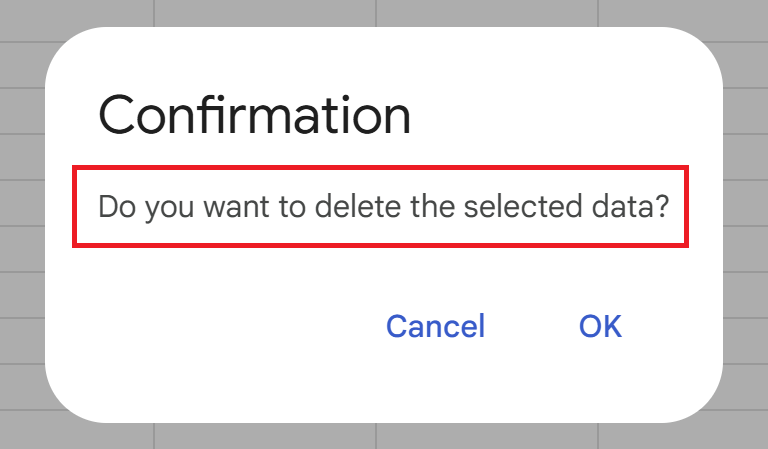
Sets the body message displayed in the pop-up.
Example: Change it to
"Do you want to delete the selected data?".ui.alert("Confirmation", "Do you want to delete the selected data?", ui.ButtonSet.OK_CANCEL);When the script is executed, it will change as follows:

- Message for the Processing Result
-
The result messages after a successful email send or when an error occurs can be customized by modifying the following sections.
Message for Successful Execution
ui.alert("Success", "The email has been sent!", ui.ButtonSet.OK);First Argument (“Success”)
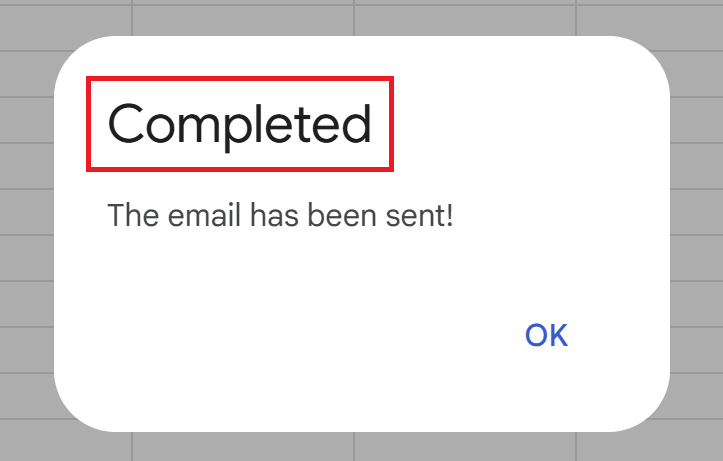
The title of the pop-up for successful execution.
Example: Change it to
"Completed".ui.alert("Completed", "The email has been sent!", ui.ButtonSet.OK);When the script is executed, it will change as follows:

Second Argument (“The email has been sent!”)
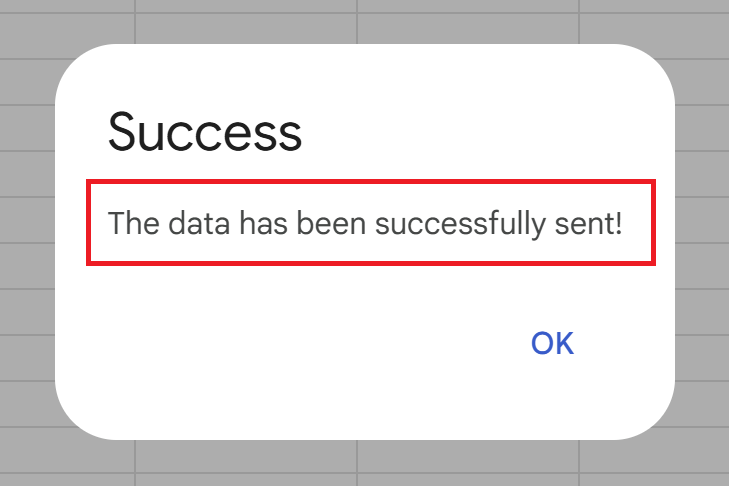
The detailed message for successful execution.
Example: Change it to
"The data has been successfully sent!".ui.alert("Success", "The data has been successfully sent!", ui.ButtonSet.OK);When the script is executed, it will change as follows:

- Message for Errors
-
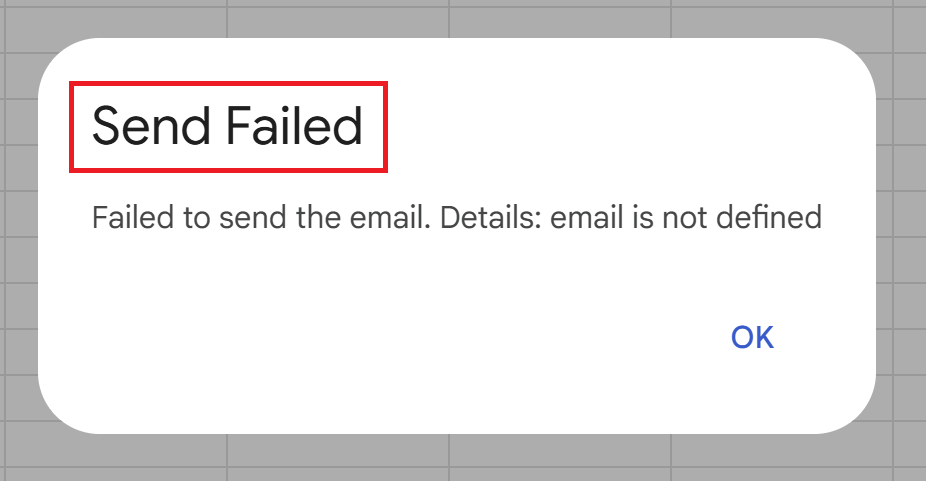
ui.alert("Error", "Failed to send the email. Details: " + e.message, ui.ButtonSet.OK);First Argument (“Error”)
The title of the pop-up for errors.
Example: Change it to
"Send Failed".ui.alert("Send Failed", "Failed to send the email. Details: " + e.message, ui.ButtonSet.OK);When the script is executed, it will change as follows:

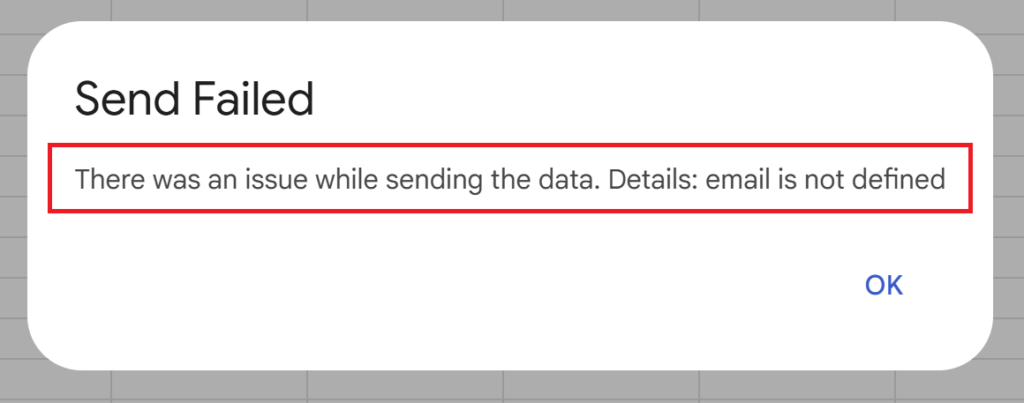
Second Argument (“Failed to send the email. Details: ” + e.message)
The detailed message for the error.
Example: Change it to
"There was an issue while sending the data. Details: " + e.message.ui.alert("Error", "There was an issue while sending the data. Details: " + e.message, ui.ButtonSet.OK);When the script is executed, it will change as follows:

- Message for Cancellation
-
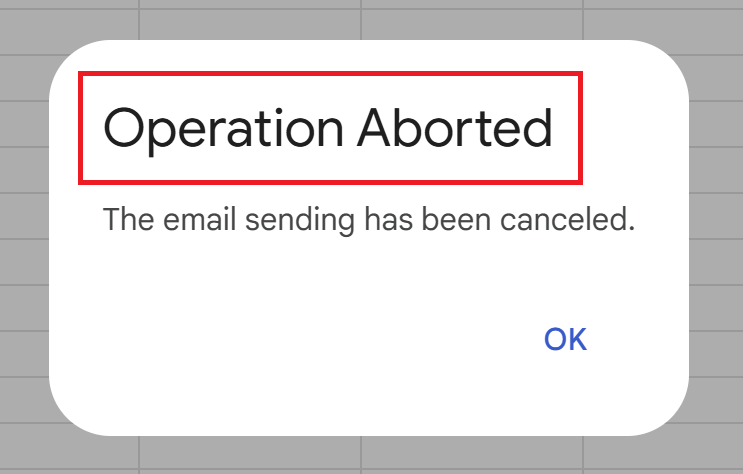
ui.alert("Canceled", "The email sending has been canceled.", ui.ButtonSet.OK);First Argument (“Canceled”)
The title of the pop-up for cancellation.
Example: Change it to
"Operation Aborted".ui.alert("Operation Aborted", "The email sending has been canceled.", ui.ButtonSet.OK);When the script is executed, it will change as follows:

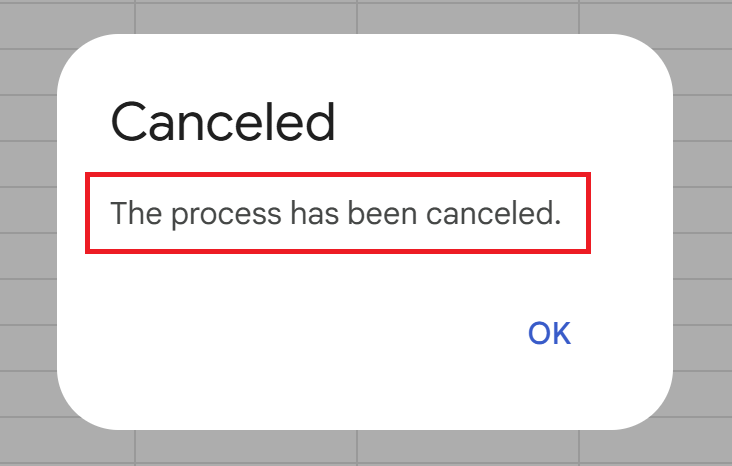
Second Argument (“The email sending has been canceled.”)
The detailed message for cancellation.
Example: Change it to
"The process has been canceled.".ui.alert("Canceled", "The process has been canceled.", ui.ButtonSet.OK);When the script is executed, it will change as follows:

Types of Button Sets
Google Apps Script provides several button sets for pop-ups, which can be selected based on your needs.
Here are the main examples:
- OK Button Only
-
Used for providing notifications or information.
ui.alert("Notification", "The process is complete.", ui.ButtonSet.OK); - OK and Cancel
-
Useful when you want to confirm whether to proceed with an operation.
var response = ui.alert("Confirmation", "Do you want to continue?", ui.ButtonSet.OK_CANCEL);
Yes and No
Used when you need a clear answer to a question.
var response = ui.alert("Question", "Are you sure you want to execute this?", ui.ButtonSet.YES_NO);
Conclusion
With Google Apps Script, you can easily add pop-up functionality to create a system for preventing mistakes or confirming actions.
Google Apps Script with pop-ups can be applied to various use cases beyond email sending, such as data deletion, updates, or conditional processing.

Our company offers support for improving work efficiency through the use of Google Apps Script.
If you need assistance with Google Apps Script customization or error resolution, please feel free to contact us.
We are fully committed to supporting your business improvements.
Contact us here




Comments